Showing posts with label renovation. Show all posts

Monday, August 19, 2013

That one time we made a laundry room...

When we were looking at houses last year, one of the things that Josh and I both agreed we really needed to have in a new house was a laundry room.  The first two houses that we put offers on both had huge, awesome laundry/utility rooms (I'm not dwelling on those anymore, I'm just sayin').  This house, the house we ended up buying and now inhabit, did not have a laundry room.  But structurally, the house was well-suited for some renovation that would allow for the construction of a laundry room.  Plus, Josh would get to tear out a wall and use his demolition skills.  So, hey, what the hell.  Let's build us a laundry room!

This is what the "laundry area" of the house looked like originally:

Basically, there was a small, inset section of wall between the kitchen and the bathroom where the tall, upright water heater and a stacked washer/dryer unit lived (the washer/dryer were no longer in existence when we purchased the house).  And like everything else, it was pink.  And carpeted.

I made a schematic so that this upcoming description won't be too confusing:

First of all, we have a massively huge bathroom in the middle of our house.  This room used to be a bedroom, and at some point somebody decided to make themselves a giant bathroom with two entrances and a walk-in closet.  It's cool to have such a large bathroom, but it's a little odd.  And most importantly, we did not need a large walk-in closet in our bathroom.  We decided to remove the wall of the closet that once created the "laundry nook" (it's the purple wall in my handy little drawing) in the hallway between the bathroom and the kitchen, thus creating an open space that we could use as a laundry room.  We also sealed off the closet door into the bathroom (shown with green dots).

I wrote a post a while back about Josh's demolition skills, and this room really put those skills to the test.  First he tore down the wall to create the open space we needed.  After we had removed the old water heater, Josh noticed that there was a little bit of water damage to some of the floor boards underneath, so he had to cut a chunk of the floor out and replace a number of boards.  This actually proved to be convenient, because we also needed to reroute all of the pipes for the water and gas lines to the back of the new room we'd created in order to hook up the washer, dryer, and new water heater.  So, Josh spent many days under the house, climbing in and out of the giant gaping hole in our floor.  And then he patched the floor!  And then we patched the walls!  And then it was starting to look like a real room!


We decided to install a tankless water heater in place of the old, standard one.  This is great because it's way smaller and we were able to hang it on the wall above the washer, and it's really efficient.  The down side to reorganizing this room and installing a new kind of water heater was that Josh needed to cut new vent holes through the roof of the house, which was a bit of an ordeal.  This ultimately resulted in us having to strip and re-seal the entire roof, but that's a story for another day.  The bottom line is that he did in fact cut holes through the roof of the house, and we now have a nicely-vented water heater as well as a light/fan combo to help ventilate the room.


After we had finished patching up the walls and ceiling, we tiled this room the same pattern as the kitchen and the bathroom on either side of it (these three rooms were all tiled at the same time).  I chose to paint this room a bright golden color because there are no windows nearby and I wanted to be sure that it didn't just feel like a dark closet all of the time.  I like the yellow quite a bit, and it looks really nice when you see the blue kitchen cabinets in the background as well.  I found a good deal on a front loader washer/dryer set on Craig's List, and after a fair bit of spillage we finally managed to get everything connected and in proper functional order.  We turned on the newly-rerouted water and gas pipes, and nothing exploded!


Finally, I bought these cool shelf brackets online and used some of the old boards we salvaged from the office demolition to make some shelves for the wall.  I'm still debating putting more shelves on the opposite side of the room, but haven't decided yet.


We still have a little bit of cleaning up around the edges to do in here, but overall it's in good shape.  I mean, this room didn't even exist before- we made it!  So, finally, your before and after shots:

Saturday, August 10, 2013

Den, Before and After!

Ok, back to the house renovations!

Our den didn't need a ton of work when we bought our house, be we definitely knew that we wanted to give it a serious makeover.  This room is where the TV lives and where we spend a considerable amount of time, so we wanted it to be warm and comfortable and well-suited for entertaining.  The very first step, like with all the rooms in the house, was to remove the carpeting.  Then we also removed the hideous ceiling fan, which was promptly donated to the ReStore.  Obviously somebody thought that fan was a good idea at some point, so hey, maybe some new person will wander into the ReStore sometime soon and just be thrilled to find such an item for their future home upgrades.  Power to 'em.


While I am not at all opposed to the use of yellow on interior walls, it just didn't seem to be the right color for this room.  We get a lot of natural light through the windows during the day time, and the yellow just seemed a bit too much.  Plus, we are using pretty bold colors in much of the house already, so we decided that neutral tone would be nice in the den.  We chose a light shade of brown that is sort of coffee colored, and I love it.  Then we hung a new ceiling fan and some new blinds, and it was starting to look like a new room!

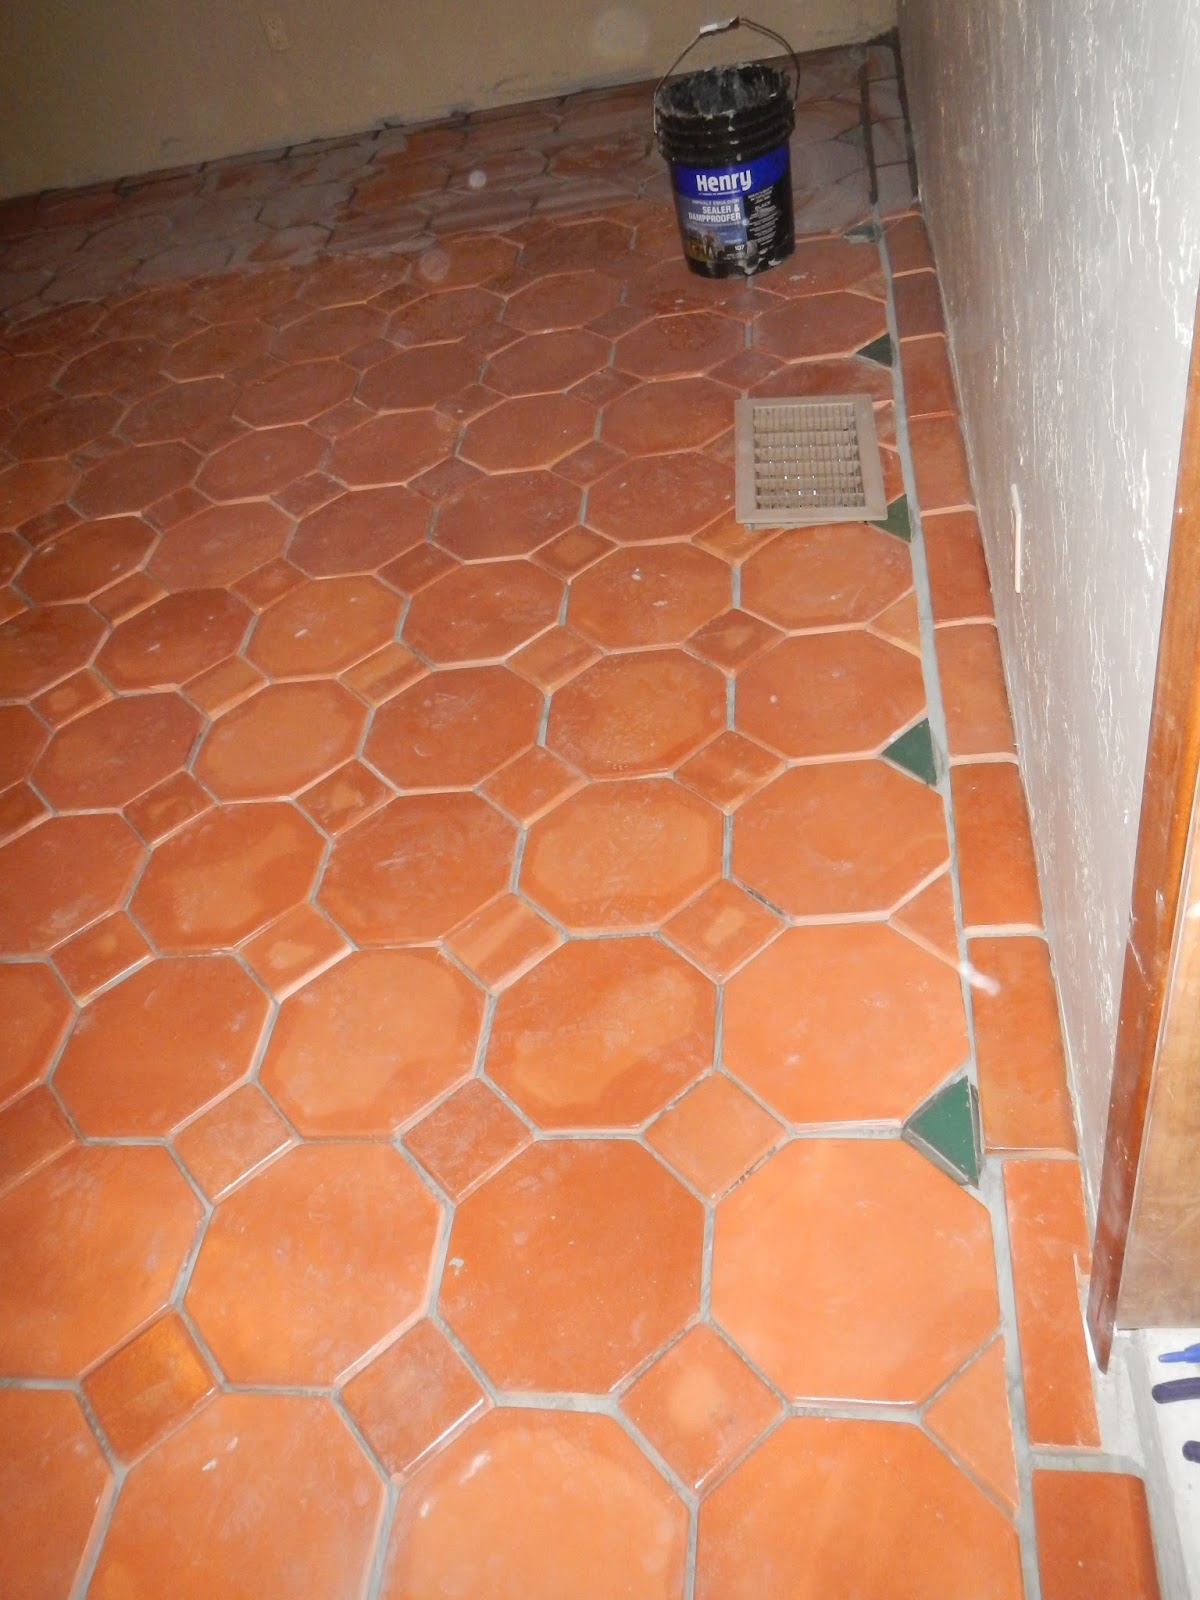
Unlike most of the house, which is subfloor, this room was a later addition and has a concrete slab floor.  We left the concrete floor exposed for quite some time while we worked on other parts of the house, but once the summer came around and we started thinking about planning a house-warming party, we decided it was time to do something about the floors.  Originally, we had thrown around the idea of redoing this floor with brick pavers.  I still think that this would have looked very cool, but in the end we decided to keep up with the Saltillo tile.  We played around with different patterns for a few days, and finally settled on using octagonal tiles.  One paycheck out the window and two trips to the tile store, and we had our tile!  Then came the fun part.


After we got the tiles home, we played around a bit with how to lay the tiles within the space we had in the room.  It's a big room, so we definitely were glad to be using a relatively simple pattern compared to what we did in the kitchen.  Josh had the idea to put a thin border around the room, which would allow us to have accents in the triangular shapes that were created by halving some of the square spacer tiles.  We both agreed that we liked this style of accents better than having random colored tiles throughout the room, so we ran with it.  And I swear we had some serious luck with this room, because after laying out a couple of rows of tiles on the dry floor to figure out our spacing, we realized that we would not have to cut one single octagonal tile in order to fit everything evenly between the borders!  We couldn't have planned that better even if we had tried.

Josh and I figured out our own system of tiling pretty quickly while we were working on the floors in the kitchen/laundry/bathroom (I still need to do a detailed post on the tiling process), and with this room we really dialed this in.  We're like professionals now!  My job is to lay all the tile, including cutting everything to size.  Then after the entire floor is laid out, Josh is in charge of grouting.  I started laying tile in this room on a Saturday afternoon, and by the following weekend we had the whole room grouted and ready for the baseboard tiles and sealant.  I'm pretty proud of us.  And it looks damn good.


So, before and after (!):


Quite the improvement, eh?  It really is amazing how much new flooring can completely change a room.  We've got some pretty rugs and some colorful furniture and this room is now fully functional as a cozy hangout for us and our pups and our guests.  I love it.

On a side note, from the time we very first looked at this house, I had said that I really wanted to install in fireplace in this room.  We looked into a local company that manufactures kiva fireplaces, and we were almost ready to pull the trigger on purchasing a corner kiva fireplace to go opposite the windows in here.  While I still desperately would love to have a kiva fireplace (the house currently has no fireplace at all), we decided that in the scheme of things that we wanted to put money/effort into right now with the house, adding a fireplace was not at the very top of our priority list.  So, it may happen sometime in the next couple of years, or it may not. In the meantime, we have a 60" television that can easily project a nice big (and smoke-free!) fire if I get too nostalgic, and we'll probably be constructing a firepit of some kind in the backyard this fall.

Wednesday, July 31, 2013

I'm still here.

I'm not dead.  I've just been busy.  And work has been crazy.  And sitting in front of my computer after I get home from work has been the last thing I've been interested in doing.

But!  The house is looking great.  We've done a lot of work in the last couple of months.  We've had a couple of birthdays, we've had time to do some fun things, we've been back in the swing of working out regularly, and we (finally!) had a really fantastic housewarming party with a ton of friends.  Things have been really great.  We still have a lot to do on the house, but we're finally at a comfortable place where we can enjoy living in our home and put off the rest of our list for a while.  I actually have time to work on other fun projects!  I'll post some new furniture projects as I get them completed.  And I'm going to try to get up some new before-and-after photos of the house.  I'm pretty impressed with us.  Our house is looking awesome.  We're pretty awesome.

Wednesday, June 12, 2013

Things we've found.

To say that the previous owners of our house made some questionable decor choices would be a major understatement.  However, I'm pretty sure many of those choices were made 30, 40, or more years ago... so I'm inclined to let some of it pass.  For instance, this ceiling fan:


And these cutesy, old-lady bathroom fixtures:


And let's not even talk about the shag carpeting and the pink walls again, ok?

While working on the pipes under the house, Josh pulled out a ton of stuff that had been left behind in the crawlspace-- tires, old bamboo mats, construction materials, and multiple fruit baskets filled with random, old crap.  Here are a few of the more interesting things we've found in and around (and under) the house, left for us by the previous homeowners:


I keep hoping to find a Picasso hiding behind some of the wall plaster, but alas.  I just don't think I'm destined for Antiques Roadshow fame and fortune.

Monday, June 10, 2013

Mission: Kitchen cabinets. Objective: Blue.

I think for about two weeks straight while working on this project, I would show up to work every morning with blue paint on my hands.  And in my belly button.  And in my hair.

Seriously.  Painting kitchen cabinets is no joke.  Though it is not technically difficult, the necessary time investment is ridiculous.  I am SO glad I decided to get this done before we moved in to the new house (I finished the painting part well before we moved in, but was not able to actually re-hang everything in the kitchen until this past weekend).

Technically, there was nothing wrong with our kitchen cabinets.  They're in good shape, and they're not very old at all... they were just... meh.


So, I decided to paint the cabinets.  After looking through millions of photos online of various kitchen color schemes, and once we had decided on definitely using Mexican tiles in the kitchen, the decision was made to paint our cabinets blue.  I tried a couple of different shades of blue, and ended up choosing the one that most closely matches the blue that shows up in most Talavera-style tiles and decor.  That way, no matter what tile colors we end up using for the floor accents of the wall backsplash, it'll all be somewhat coordinated.


Keep in mind that we are doing most of the work on our new house in the evenings after we get off of work, so things are taking longer to get done than they would otherwise.  This whole process took a little more than a week and a half from start to finish, during which time I worked on nothing but this task.  The first night, I took off all of the cabinet doors and drawer fronts, removed all the horrible hardware, and gave all of the cabinets a light sanding.  This seemed to take forever.

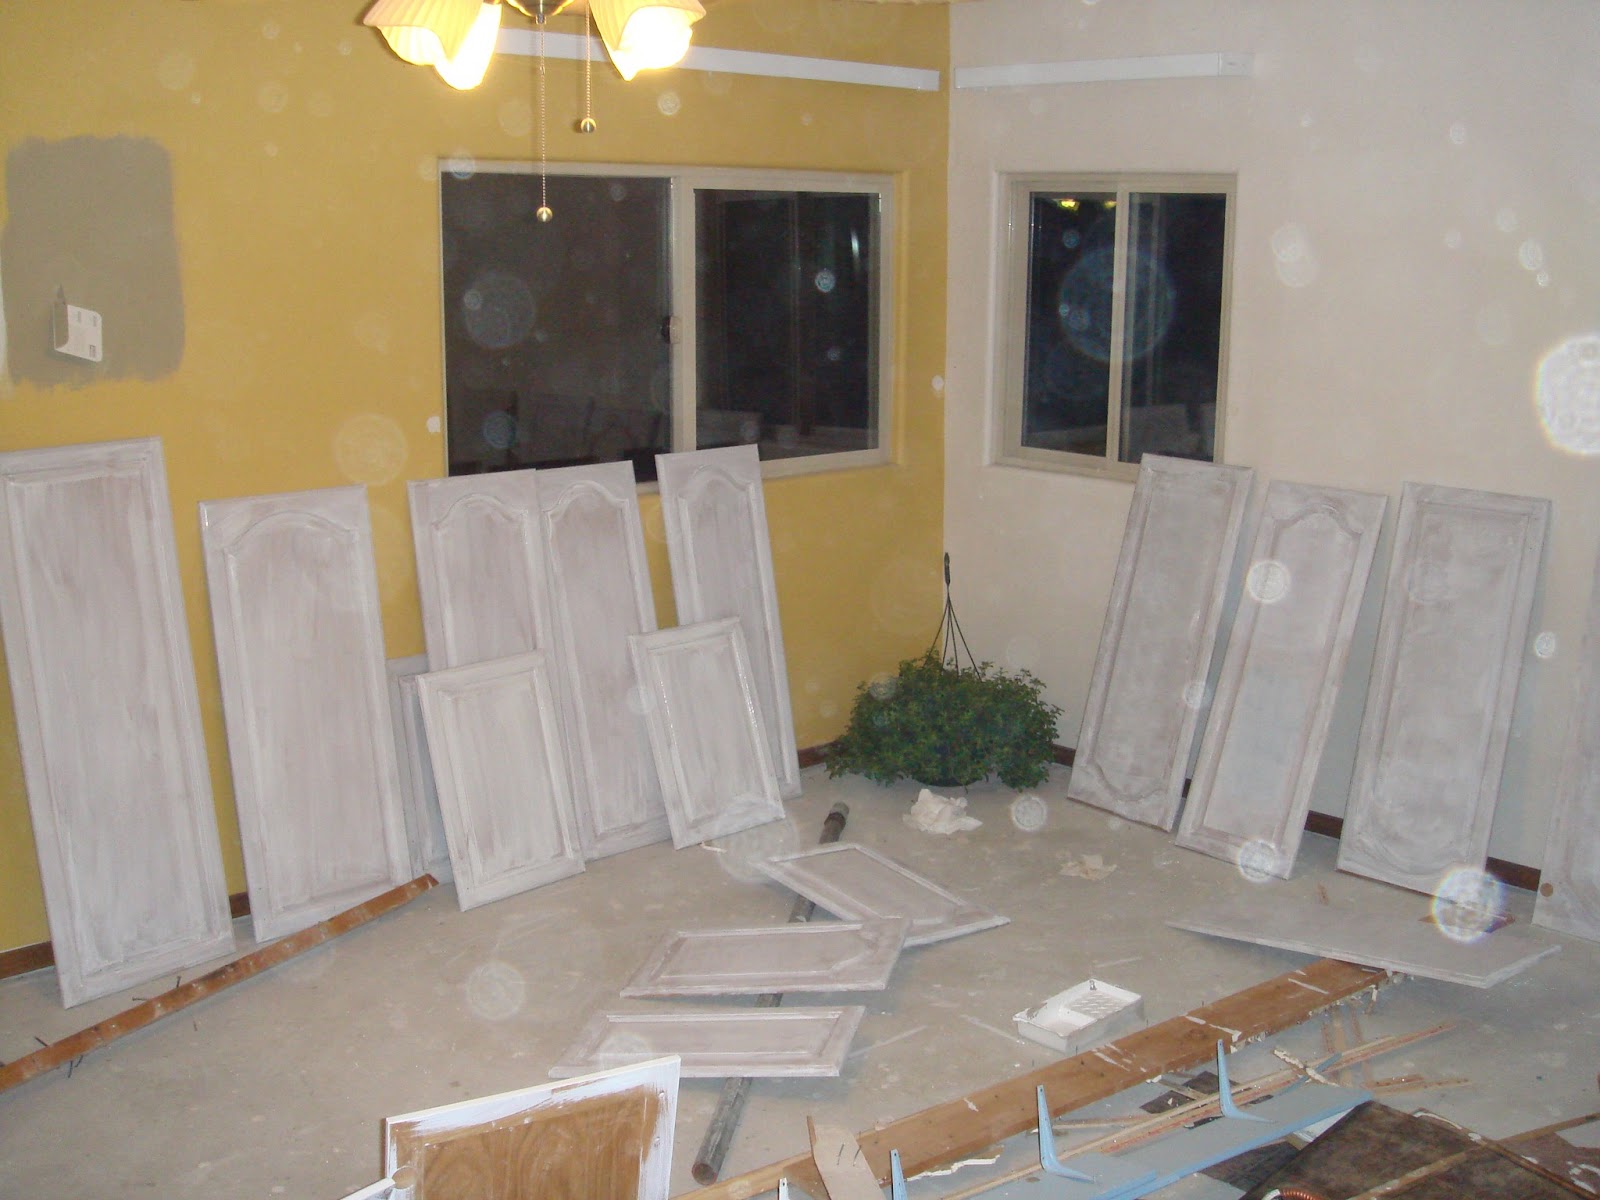
It took me a good portion of one night to prime the cabinets in the kitchen, and another night (with assistance from my coworker Lisa) to prime all of the doors.  We have 30+ doors and drawer fronts in our kitchen.  That is fantastic for storage, not so fantastic for painting.  I used KILLZ primer, and it seemed to work pretty well, although I wish it had been a little bit thicker because then maybe my single coat of primer would have looked a bit nicer (yes, maybe I should have just done two coats of primer.. but seriously, this was taking way too long; I'm impatient).  [Josh told me that I "did a crap job" priming everything.  I'm keeping that one in my back pocket for later, folks.]


I went to work on painting the cabinets before I bothered with the doors.  This turned out to be a good plan, because the cabinets themselves required three coats of paint whereas the doors only needed two (the cabinets themselves are a glorified laminate material, but the doors are actually real wood- this made a big difference).  I left the inside of the cabinets alone because I figured it might look a little too dark if everything was the same blue color.  I think it was the right choice.

I used Valspar Signature Paint+Primer, and have no complaints.  I had a little bit of an issue with roller marks staying on the side of the cabinets, but I think that was more a result of using a less-than-awesome roller than the paint itself.  And I love the color!  It's call Deep Sea Diving.


It took me a few days to paint the cabinets and the doors, but with each new coat of paint they just looked better and better.  Once everything was totally dry and done, I gave two good coats of polyurethane to the doors and the ends of the cabinets to keep them protected.  Considering the messes that result when my betrothed cooks, these cabinets are going to be subject to quite a bit of scrubbing in the future, and I'll be damned if I want to go through this whole painting process again any time soon!  The polyurethane took a few days to completely seal, and I did two coats just to be sure.

I finally got to hang everything back in the kitchen this past weekend, and I couldn't be more pleased with how it all turned out.  The color of the cabinets looks fantastic with our newly tiled floors (more on this in a different post).  After moving everything inside from the workshop I noticed a few dinged or rough spots that I'll have to patch up with a little bit more paint, but you can't even see the imperfections unless you are right up next to them so I'm not going to stress about it for now.  I purchased some new cabinet hardware to match our faucet and light switch covers, and that just about sums it up!  Not bad, eh?

Before...

During...

After!


Summary:  Painting cabinets is kind of a bitch.  It's not hard to do, it just takes forever.  But for me, it was completely, totally worth it.  Almost makes me want to go paint the cabinets in our bathroom too...


Saturday, June 1, 2013

Paint ALL the walls!

When we said we were re-doing the entire inside of our new house, we meant it.  When we're done with this baby, not a single wall nor ceiling nor door will be the same color as it was when we purchased the house.  I've got a pretty good jump on painting most of the house already, but there's still quite a bit to do.


Some of our friends came over one night in the first days of our housework and helped to prime all of the non-white walls.  That made a huge difference and really made it easier for me to paint most everything else by myself.  Luckily, I've been spending a bit of extra cash for the good, thick paint and we haven't had to use more than one coat on most anything.  The darker colors (like the red we're using in the living room) needed two coats, but otherwise it's been pretty smooth sailing.  Then one of my old field school students came to visit ABQ for a few days with three of his friends, and we let them crash at our old house in exchange for some help painting.  So in the span of only about 3 hours, we got two rooms painted!  That was pretty awesome.


I spent more than a week painting the kitchen cabinets, and THAT was a doozy.  But I'll save that for a different post in itself.  Also, all of the walls in our house are textured.  Textured walls look nice, but damn are they a pain to paint.  Especially the ceilings.  Have you ever tried to paint a textured ceiling in a 350+sqft room, by yourself, in poor lighting?  It's a terrible idea!  My arms were aching, my neck was sore, and I still had to go back the next day and paint over a bunch of spots where the texture prevented the roller from covering everything.  But it looks good now, and that's what matters.  My kitchen and bathroom are no longer pink.  That's all that matters.

I plan to post before and after photos of all of the rooms once they get finished, so you will be able to see all of the colors then.  You'll just have to trust me that they look damn good.  We're pretty good at picking out awesome colors, if I do say so myself.

Also, I made the amazing discovery that the little 49-cent paint tools from the hardware store can double as bottle openers!  GENIUS.

Thursday, May 23, 2013

One room down...

We have one week until we have to be officially moved out of our old house.  Which means that no matter where we are in the home renovation process next Friday, that's just what we're going to have to deal with when we move in.  And that means that we're going to bust our asses over the next seven days to try to get as much completed as possible while also moving out of and cleaning the old house.  Never a dull (or relaxing) moment around here lately!

I realized a few days ago that I kept getting caught up on doing little things around the house that can really wait until we've moved in (for instance, painting the doorways and trim around the house), and that I needed to start focusing on finishing up the bigger projects and getting all of our crap moved over.  It's driving me crazy not to be able to post about finished projects right now, but I guess I'll just have plenty to show off later.  [My beautiful kitchen cabinets are completely done and completely awesome-looking, but I can't hang the doors yet because I don't want to get them all dirty while we're tiling!]

My big victory from last week:  we have one mostly-finished, inhabitable room!  I got the entire master bedroom painted (including the horrible yellow closet interior) and I replaced all of the baseboard molding.  And obviously, the lovely shag carpet has been magically transformed into beautiful wood floors.  I still want to paint the trim around the doors, but otherwise this is our first room makeover to show off, and I'm stoked.

Before:

After:


Wednesday, May 15, 2013

Month one of home ownership: success!

I've gotta say... we're pretty much rocking this whole DIY house-remodel stuff.  Josh and I are both walking around like zombies, I've gained probably ten pounds from not sleeping and constantly eating crap food, I scrub paint out of my hair every single day, I haven't sat down and watched a movie on my couch in weeks... but damn if I'm not having a blast.  I admit, the novelty of it all has worn off a little bit from a few weeks ago, but I'm definitely not tired of it yet.  There's something so rewarding about being able to see how much the house has changed and how good it's starting to look, and to know that we did it all ourselves.  And the best part of it all is that we haven't killed each other yet.

I'll put up more photos of progress soon, but I've been trying to wait until a few of the on-going projects were finished so that I could post some finished photos.  I'm just about done with the kitchen cabinet makeover (a serious undertaking, let me tell you), and we now have a real laundry room!  We've started the process of painting the whole house one room at a time, and with the help of some friends last weekend, the master bedroom is almost complete.  Josh has spent a good chunk of the last couple of weeks underneath the house in the dusty crawl space, replacing pipes and rerouting water lines for the laundry room.  We still need to fix a small gas leak and patch up the walls in the laundry room, but then hopefully within the next few days we can get onto the fun of tiling the floors!

I'm pretty sure that the employees at Lowe's, Home Depot, and Ace are all starting to recognize us.  Ask me what aisle something is located on in any of those stores-- I could probably tell you.  We've been moving carloads of stuff to the new house every day in an attempt to start emptying out the old place.  It's slow-going, but I'll be very happy to not have the stress of moving all of our stuff at once later in the month.  So, things are going well.  Our new house is going to kick ass when we're done with it.

Last night, Albuquerque got the first good rain we've had in many months... Josh and I took a break from patching and painting walls and sat on our new front porch, drinking margaritas and watching the rain.  I'm excited for many more nights just like that in our new house... maybe only minus the paint splatters and splinters and residual sulfur smells from seeking out that pesky gas leak.